Thursday, December 29, 2011

Closing in


We have had a short production week with many of the crew members taking extra time off for the holidays.  In spite of this we have accomplished a great deal.


The carpenters have completed the installation of the foam on the north wall with the exception of the garage and will have the better part of the south wall complete today.  They should be able to finish the rest of the insulation and fiber mesh lath by the end of next week.

The electricians temporarily wired all of the mechanical equipment so they can be started up.  The well, sump pump, heat pump, heat recovery ventilator, and hot water heater are ready to go. 


The geothermal crew completed the installation of their piping to the heat pump and filled the lines with water and a 25% solution of an environmentally friendly antifreeze.  We turned on the well to bring in water to fill lines for the heating system so we hope to have the heat on by Friday.  The hot water heater was installed today which is the last major component needed to start up the heat pump and begin warming up the floors.  The temperature controls are turning out to be fairly complicated, but we should have them operating at least on a temporary basis by the early next week.


The metal roof is done on the north side and they have started on the south side.  The gutter we designed to go over the front entrance will be especially useful.  The little bit of snow that had accumulated on the roof, melted, dripped down on the sidewalk, and frozen into a skating rink, will all but disappear after it is installed. 


The plumbing inspection was completed, followed quickly by the final building inspection without issue.   We are now ready to start insulating and are scheduled to start next Tuesday.  One code requirement is a carbon monoxide (CO) detector normally located near the bedrooms.  Since we have no equipment in the home with a combustion source, the building inspector is allowing us to locate the CO detector near the entrance to the garage to allow air quality monitoring from vehicle exhaust.  To further assure that we do not have CO infiltration from the garage, we have installed an exhaust fan in the garage that will be tied to the lighting control timer for the overhead garage door opener.  The fan will start up when the overhead door opens, and shut off when the light goes out.   
 

The transom for the front door arrived, although without glass.  We needed the transom frame in order to begin drywall and exterior trim.  The picture shows the transom in place with foam in place of the glass.  The black material on the door frame is foam pipe insulation that is a protective cover for construction traffic. The picture also shows the four inches of foam with the joints of each layer staggered so that air infiltration is virtually eliminated.  


The tub and shower both finally arrived .  Unfortunately the shower was bigger than the door opening, so we had to remove the garage door and frame to get the shower inside.    


The next week will be a turning point in the project, marking the start of the finishes stage.  We will have a warm, dry, insulated building with a possible start on the drywall installation.  

Thursday, December 22, 2011

Roofing Started

The electrical and mechanical inspections are complete.  The plumbing inspection is waiting for the tub and shower to arrive.  The manufacturer delayed shipment another week without letting us know until the day we were expecting it on the site.  This one element has put us about two weeks behind schedule. 


Production fell victim to holiday stresses with contractors tapering off their schedules in anticipation of the holiday weekend.  For my part; I had been told by the electrical inspector that the light fan combination unit did not appear to meet code for use in a bath or shower.  The next day I removed the original fixture and discovered the markings the inspector had been looking for clearly marked on the inside of the fan housing.  Then, completely unencumbered by the thought process, I proceeded to dismantle the light/fan and attendant ductwork, and re-frame the opening for the new fixture I had purchased.  A couple of hours latter, it finally dawned on me that I needn't have done anything. I dutifully re-installed all of the original ductwork and the light/fan combination... After I took some time to get some lunch.  Are the Holidays here yet????


We did get the soffit and fascia completed on the front and back, and started to install the soffit on the west gable.  We began installing the 4" of foam insulation on the west gable as we discovered a construction detail for the soffit and fascia was inter-related to the installation of the foam sheathing.  Here they have installed the "Spiderlath" to hold the foam in place against the wind.  Spiderlath is a fiberglass alternative to metal lath for the cement stucco that we will be installing in the spring.  We need at least 72 hours without freezing conditions for the stucco to cure properly.


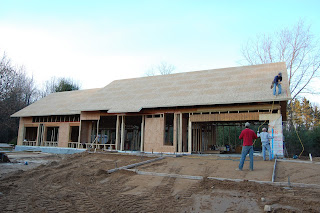
The roofing started yesterday.  This is the end result of about four hours of work in the field.  A good deal of time is spent in the shop fabricating the panels and trim.  Though this shows the north side of the house, the panels are fabricated to accept the solar panels we have selected.


We installed blocking for all of the cabinets, towel bars, and toilet paper holders.  With studs on 24" centers, you cannot rely on having a stud nearby to fasten cabinetry to, so wood blocking must be installed to provide anchor points for cabinets.  We also framed in the access ports to the hydronic heating controls. 


All of the light fixtures have been ordered, and most of them have arrived with only a couple on backorder.  The remaining fixtures should be here in plenty of time for installation.  We are storing them in the spare bedroom at the apartment, so it appears we won't be having any company for the next couple of months.   


Though next week will be short, we expect to have the roofing complete, the plumbing inspection completed, hopefully we can get the final inspection, and then order the insulation.  At this point it would be victory to get the insulation scheduled much less started.  The HVAC contractor is building the heating controls in his shop, and expects to have the geothermal contractors finalize the installation and fill the lines.  

This will require a choreography with the geothermal installers, the HVAC installers, the temperature control installers, the plumber, and the electrician.  The electrician will need to install the electrical disconnects to provide power to the units.  We can't start the well to provide water to fill the geothermal unit until we are confident that we can provide enough heat to prevent it from freezing, so all of the controls, the power to the unit, and piping must be complete and operational.  The hot water heater still needs to be installed and the plumbing completed to provide water to the HVAC unit. 


If you look closely around the front entry you will see a string of Christmas lights framing the front door.  Judy is particularly pleased with this first solar powered contribution to the home.  


Hope everyone has a Happy Holiday!

Friday, December 16, 2011

Mini Post


 Rather than update the photos for the last post, I'm providing a mini update.  The window
design and installation went better than we could have hoped for, and we are very pleased with how the windows frame our primary view.  We are waiting for the transom over the front door to arrive which will help balance the room.


Looking towards what will become my office is the metal framing for what will be two large pocket doors that will open the space into one large room.  I will have a view out each of these large windows during the day, and will be able to close off the space for privacy as needed.


This is all of the ductwork in the home.  It provides only fresh air and not heating or cooling which will be provided by the radiant floor heating and cooling system.


This is my favorite part of the house.  The box hanging from the wall is the HRV, or Heat Recovery Ventilator.  This unit brings in fresh air, and exhausts stale air at an equal rate.  In the process, it harvests the heating or cooling energy from the exhaust air, and injects it back into the incoming air to reduce heating or cooling losses.  This HRV unit is about 93% efficient in harvesting energy from the exhaust air.

The small box on the floor is the heat pump.  This provides all of the heating and cooling we will need for the home.  It is the smallest unit available on the market, and it still provides twice the capacity we will require.  The amount of insulation we have installed, and the attention to detail with the windows, doors, and air infiltration make the home so efficient that very little energy is required to keep us comfortable.

What looks like a hot water heater on the right is a storage tank for the radiant floor heating and cooling system.  The hot water heater should be here next week, and will also tie in to the HRV.  One of the waste products of the HRV is heat from the compressors.  The hot water heater can capture that waste heat, and in doing so make the compressors more efficient.

The two red pipes hanging uncontrolled behind the HRV are the future loops for the solar hot water system. The hot water heater we have specified has a fitting that will easily allow for the addition of this feature.


This is a good example of the double wall construction with one of the flanged outlets.  Any outlet or switch in an outside wall has a neoprene seal that will press against the back of the drywall when it is installed making an airtight seal.  Each wire also passes through a neoprene gasket seal.


The exterior trim is being installed in preparation for the roofers on Monday.  With everything that happened today, we are in good shape to get our electrical and heating rough-in inspection early next week. The only hold up on the plumbing is the arrival of the tub and shower which might be here Monday.    


Thursday, December 15, 2011

Power!

The power company received faint praise for their reliability in my last post, but I gladly eat my words.  The Consumers Power crew showed up in four trucks early on Monday morning to install our permanent power, and by the end of the day we had an operating electrical service.  


We had requested the electric service to our home be installed underground.  There is a cost premium for this service, but we were strongly motivated by the aesthetics for the long term.  A secondary power line crosses a section of the property that serves a good share of the township.  The pole supporting the secondary line that would serve as the source of our electric service was determined to be too old to mount the transformer.  Part of the job was to replace that pole with one that would be up to the task.

After purchasing the land a little over a year ago, we were somewhat stunned to have the power company come through last spring and mow down the vegetation below the power lines to clear the right of way.  The scalping was quite a shock as the vegetation buffer we had enjoyed from the road was significantly diminished.

We have come to terms with the change in landscape, choosing to assist in the maintenance of that easement for the future in a prairie ecosystem with some fruit bearing trees along the margin that will not encroach on the power lines.  We have come to enjoy this feature and look forward to further developing the site.  We have other areas we can infill to provide screening, but will have to wait a few years for it to mature.
 
This pole also serves our neighbor across the street.  Since we want to be part of the solution in maintaining the easement, we opted to move the driveway underneath the power lines that serve our neighbors, thus avoiding the need to maintain the severe maintenance program, and allowing us to infill the old access road with vegetation to provide screening. 

The carpenters finished framing the interior and the plumber is almost done with the rough in plumbing, save the installation of the tub and shower units which are due in next week.  The ductwork for the fresh air and exhaust system is complete, and the piping for the heat pump should be done by the end of the day tomorrow.  We are expecting the hot water heater to arrive next week which is also attached to the heat pump.  If all goes well, we should be able to get some of the final inspections completed by the end of next week in preparation for the insulation.    

The exterior trim arrived today, so we can begin installing the soffit and fascia.  Completing this will allow the roofer to start on Monday. 
 
Our daughter Rachael with a background in both Interior Design and Graphic Design was in town to help us pick out colors.  Though we had discussed general themes, we had a great sunny day to contrast the floor and cabinet colors with the paint selections.  We are very pleased with the selections and the process, and feel that for the first time we will have a unified expression of color in our home. 


It has been raining steadily for several days now, so I have not been getting good photos.  I will post more progress pictures this weekend.

Thursday, December 8, 2011

Closed In!

This has been a very productive week.  We finished the rest of the sheathing both of the ceiling and the exterior of the house.  We sealed the plywood joints with the 3M 838 tape which is described as flexible between -100 and +225 degrees Fahrenheit.  I’m not sure where they tested those extremes but it leaves plenty of room for error in this climate zone. The roofer was able to install the synthetic felt by TriBuilt.  The material is much stronger than the old tarpaper building felts, and will last in strong winds and sunlight for long periods of time if necessary without falling apart.  


The framing is almost 100% complete.  A few details like bulkheads and railings need to be completed, but the mechanical and electrical contractors can get started now.  They should be done by the end of next week and ready for inspections.


The windows and doors were delivered by Standale Lumber this morning.  We had them all installed by the end of the day.  The windows are the Serious 925 series windows.  It is one thing to see them in a catalog and look at samples, and another to see them installed.  I think we are really going to like these a lot.  They have a very spare aesthetic which came out better than I had hoped for at full scale. 


The doors are made by Thermatru.  I selected this door because the air infiltration test data was very good.  It is very difficult to determine thermal performance for a production door.  There are so many possible design configurations that I think they just gave up on providing any information.  The transom over the front door was missing but will be delivered in the next few days.  Otherwise there were no problems with the installation.  All of the rough openings were the right size and all of the windows and doors fit.


There are several design components we needed to accommodate for the door.  The standard door threshold was 1½” high, which is not very conducive to barrier free design.  There was a barrier free threshold available, but it had no thermal stop capability included.  To get the energy efficiency available by using the standard threshold, and accommodate barrier free design, we had recessed the concrete floor ¾” so that the transition from the interior finish floor was only ¾”. 


The threshold is angled to the outside, so the transition on the exterior is only about ½” at the threshold, an angled plate, and a ¼” nose on the threshold.  The wall thickness requires that we install aluminum sill extensions on the thresholds in order to cover the foam wall boards, so we will further reduce the transition at the entries.  


We are installing the windows and doors approximately in the middle of the 15” thick wall.  On the inside we will wrap drywall around the wall and run it into the door and window jambs.  On the outside we need to install 5” jamb extensions to accommodate the remaining wall thickness on all windows and doors so that we can install the window trim. 


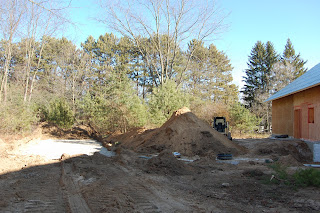
The drainfield, septic tanks and driveway were installed.  The county health department inspector has blessed both the drainfield and the well installation.  The driveway was being finished as I left this afternoon, but we have been looking forward to this for some time.  We installed the black fabric in the picture to prevent “soil consolidation”.  The fabric is a heavy but loosely woven material used in highway construction that helps prevent the crushed concrete and sand from mixing together over time with the weight of traffic and the effects of weather.  Water can easily pass through the fabric and the crushed concrete.  We opted for the crushed concrete because it compacts very nicely into a firm surface and is a 100% recycled product. The alternative is crushed asphalt.  The volatile organic compounds in the asphalt can leach out over time and eventually get into the water table which we and our neighbors rely on.    


Next week we will be able to substantially complete the plumbing, heating, and electrical work, and order the rough in inspections.  We should be able to start installing the foam insulation on the outside of the building, and bring the site up to close to the final grade.  Rumor has it that the electric utility may install the underground service as early as tomorrow, though holding our breath for that to happen is inadvisable. 


Thursday, December 1, 2011

Ready for the roofer


The short week last week was long forgotten as we set the roof trusses on Monday and completed sheathing them today.  The roofer will be installing a waterproof membrane over the roof sheathing tomorrow to get us in the dry. 


This illustrates a raised heel truss from up in the attic looking down.  A typical truss has the rafter which is the top angled piece join the ceiling joist at the top of the wall in a triangle.  The depth of insulation at the wall is restricted to the dimension of the two wood members which provides ineffective insulating values near the eaves.  To get the insulating value we desire, we designed a space in the truss to accommodate the 30 inch depth of the insulation we plan to install.    


This illustrates the attic truss design.  The attic floor allows for 30 inches of insulation, and the attic has a standard 8' headroom.  We optimized the pitch of the roof to collect solar radiation on an annual basis at our latitude.  This was done partly for aesthetic reasons to avoid having roof racks to support the solar collection devices, but also to reduce the added weight of the roof racks by integrating the solar panels into the design of the roof.  This avoids having to reinforce the roof trusses to accommodate additional structural loads.  

The byproduct of this decision is a monstrous attic.  We had significantly downsized our living requirements, but we did not want to limit the next owner to a three bedroom home.  The attic is designed for expansion.  A stairwell can be installed over the basement steps to easily access the attic.  Plumbing will be accessible from either of the bathrooms below, and dormer windows can be installed for light and ventilation. 

We installed Pex tubing in a chase from the basement to the attic for a future solar hot water system.  The hot water heater is designed to accommodate a solar hot water collector.  We laid out the locations of all of the mechanical equipment in the basement, and prepared to run the electrical wiring.  We want to install the drywall before too much mechanical equipment is installed to make the installation of the drywall easier. 


The excavator brought the grade up so we can pour the last of the concrete.  We are required to have a safe means of egress in order to obtain a certificate of occupancy, and installing the permanent walkway is preferable to a temporary walkway.  We are fortunate not to have frost in the ground which would have prevented pouring the concrete.


Over the next week we will finish the exterior sheathing, install the plywood “lid”, pour the remaining concrete, install the windows and doors, and come close to completing framing of the interior partitions.  The mechanical and electrical rough in will begin in the basement.  The excavator will begin the installation of the drain field, septic tanks, and stormwater cistern.  Should be a big week.

Wednesday, November 23, 2011

Exterior wall framing is done

Framing this week has been productive.  We deferred setting the trusses until next week to be sure we have all of the details right.  Of particular concern is the air seal of the building envelope.  This is a continuous layer that will serve to prevent air infiltration.  In this building it will occur at the plywood sheathing on the walls and at the ceiling.  Partly due to the weight of the attic insulation, we are installing a plywood ceiling (“lid” in construction lingo) where we will tape all of the construction joints.   

To be certain we have an air tight seal, we have extended this layer to the outside wall.  The design of the lid becomes the cap for the double wall system, and the trusses then also bear on top of the lid at the outside wall. The strip was installed with a wide enough rip of plywood to close off the top of the wall, tie the two walls together, and provide a seam far enough away from the wall that when we install the tape seal we will not scrape our knuckles on the wall during the installation. 


Window headers are normally doubled up 2 x 12 boards with a sandwich layer of plywood to match the width of the wall and so that the header height matches the door heights.  The headers noted in the picture are engineered plywood laminated beams that are furnished in increments designed to minimize waste.  With this engineered header we only need one piece allowing more insulation in the wall cavity, however we need to fill in above the header to provide adequate bearing to the top plate.


Under the exterior wall we have installed a sill sealer that is a 3" wide rubber strip with two ½” bulbs one each side to prevent air infiltration.  Typical sill sealer is closed cell foam that does not have the compressive qualities of this product.  When we test the building envelope for air tightness with a blower door test and a smoke machine, we will see how effective this strategy will be.  This close-up picture of the seal shows the profile which is placed under the main bearing wall.    


In this detail you can see the plywood we have added to the window frames to prevent the insulation from falling out of the wall before the drywall is installed.  It served to stiffen the wall during the construction process, and will provide a surface area for the drywall to fasten to after the windows are installed.


The boring rig for the heat pump had difficulty getting through a layer of boulders that begins about four feet below the grade.  Once they got through that, they spent nearly two days boring the better part of two – two hundred foot loops at depths of 12 to 18 feet for the closed loop hydronic heating system before their hydraulic rig broke down.  The hydraulic head is in for repairs and they expect to be back on Friday to finish up the job.


We deferred the excavation due to all of the activity on the site and will get that started next week as well.  The completion of the site concrete is contingent on getting the grading done around the house.  We need the sidewalks poured if we are going to get an occupancy permit which we are anticipating in late January.  It is very hazardous to pour concrete this time of year, and few contractors will warrant work done after Nov 15.  We go at risk on this knowing the potential problems. 


It is gratifying to begin to see the views we had hoped to capture through the windows framed in lumber.  Manifesting your vision is no simple task even with all of the skill and resources we have available.  Drawings and the assistance of 3D modeling can only take you so far in the process.  We staked out the building in the field and marked out the views, then moved the building on the site to optimize for solar radiation and views.  It will take at least a year to determine if all of our expectations will have been met.  


The trusses in the background should be up in the air for next week's entry.  The plywood is covering a window temporarily to brace the corner during the installation of the trusses.  Next week will be a big one.

Thursday, November 17, 2011

Framing begins

We had a minor setback this week.  November 15 (the start of deer hunting season) has taken a toll on the project.  We had hoped to be setting the trusses by now, but are several days behind.  I had allowed an extra week in the schedule knowing of this potential, but the loss of momentum is disconcerting nonetheless.  Our framing crew was a crew of one this week, so we hope to pick up next week.   

Framing both sections of the double wall simultaneously

The window well for the basement egress window is complete at the expense of a hammer drill I have had for only a couple of years.  I rode it too hard on this project.  I guess that is why we have contingency funds. 

Sectional window well for basement egress window

We did get the garage floor slab poured on a beautifully sunny day.  All that remains is the entrance sidewalk and approach to the garage which I hope to pour early next week.  I have asked the excavator to begin installing the septic system and finish grading the site.  Getting he driveway in will be a great help. 

He prepared and poured this entire slab by himself in one day
 
The trusses were delivered with some little drama.  The truck got stuck and had to be towed out.  Some of our vegetation took a hit.  The driver seemed to be having a bad day, so I did not pull out a can of “One of Those Guys” on him.  Ok, we lost a couple of Autumn Olive, so he really did us a favor.  We should be able to set the trusses early next week. 

Yes it did snow a little today.  The little trusses on top are pony trusses.  The main trusses are too big to transport so they cut off the tops and ship them to be added in the field. 
 
We had picked up some used rubber roofing to use as liner for the grade level rainwater collection system.  I opened up the folded material and cut it in to sections that would suit our application.  The sections will need to be glued together, but the inventory is a little short and I will need to pick up some more. 

I have made a significant blunder and have only myself to blame.   A discussion several months ago with the concrete contractor had left him with an impression of the type of concrete sealer I wanted to use.  I was waffling on the subject, but had in mind a concrete hardener in lieu of a sealer as it would require no maintenance.  I failed to validate the material before it was applied and even I helped apply it. 

The sealer arrived on the job site the day of the pour and the instructions require it be installed while the concrete is still wet.  It is a toluene based sealer, which will be very durable, look great, and is even VOC compliant per the South Coast Air Quality Management District Rule 1168.  

However I am extremely sensitive to off-gassing materials and had to this point gone to extreme measures to be sure none entered the project.  The advantage of toluene is that it off-gasses almost immediately, and in an outdoor application there is low risk of exposure.  Given my sensitivity to VOC's, the disadvantage is that in this extremely tightly constructed house we will not be able to maintain the finish.  Unfortunately I am figuring this out after the fact.  

The next week should be busy.  This weekend the drillers will install the heat exchanger for the heat pump.  The trusses will go up, and we should get in the dry.  The septic system will be installed and the final grade around the building will be completed so we can finalize the exterior concrete at the entrances.       

Thursday, November 10, 2011

Floors are poured

This has been a slow week by design.  We did get the slab poured last Friday with a coat of sealer on it.  It was a crisp clear morning when they began pouring the slab.  The first truck driver had completed his load and had pulled off to the side to wash out his truck.  As it happens, he was washing it out on the topsoil pile right next to a small pine tree we were planning to save. 


I asked him to stop washing out in that location as we have set aside a location on the site for washout. When he ignored my request I admit I yelled at him at which he asked me what my problem was.  When I responded that concrete washwater has a PH of over 12 and it could damage the plant material, he responded with as much scorn as he could muster “Oh, you’re one of those guys!” and packed up and left.  He succinctly summed up my philosophy and his in one terse statement.  I’m now proud to be officially included in the “one of those guy’s club” as there are many in that clan I much admire.  
 

Placing the tinted concrete

Concrete sealed by end of the day

We also began drilling the well on Friday, and got to a good quality aquifer.  It was a little bit deeper than we had hoped for, but will happily settle for quality and quantity.  Fortunately the soils in the region are all pervious from top to bottom, so the aquifer is in no danger of depletion.  On Monday they finished piping it into the basement.  Subject to having the test results and permanent power to the pump we are good to go with the water supply.

Getting ready to drop the well casing

Saturday we sawcut the control joints in the slab.  These joints provide a weak place in the slab for the concrete to break as it expands and contracts from temperature and shrinkage from curing.  At best locating control joints in a slab will only reflect a desire that the concrete will break where you direct it.  There are some age old formulas for locating control joints based on experience with concrete. 
The rest of the week, the job has been without activity.  Since the slab is our finish floor, we had planned for a week of cure time on the concrete slab before we put any significant activity on it.  We added a dark stain to the concrete, and had a hard trowel finish placed on it to give it a near mirror finish which you can see in the pictures.  The dark color will absorb sunlight during the winter months when the sun is low on the horizon and has the most exposure to the concrete slab. 

We considered a number of options for protection measures against accidental damage from construction activity and rejected all of them as too costly, fragile, or a hindrance to productivity.  We have settled for having the contractors just be careful.  The most exposed part of the project will be during the setting of the trusses when it is not uncommon for hammers or boards to be dropped.  During this phase we will use some of the rigid insulation and spread it under the work area as a protection measure.

The lumber for the framing will be delivered tomorrow, and if all goes as planned we will begin framing on Monday and potentially be in the dry by the end of the week.  The windows and doors are in town, the trusses are ready to deliver, and the roofer is on tap to dry in the building as soon as the sheathing is in place.